Learn Web Development for Beginners - Creating Your First HTML Page
If you're an aspiring web developer, a total beginner, don't know where to start, or just want to learn HTML and CSS to create your own website, read on! In this guide, we will be creating a simple portfolio website that advertises our services. You will learn HTML & CSS along the way as we progress through the guide. After finishing the guide, you should have a firm grasp of the two technologies we used to build the website. As you follow along, I encourage you to experiment with what you have learned to build the website as your own rather than copy what I do. This practice will make you learn faster as you are encouraged to think, rather than copy and paste code mindlessly.
So, what are we building?
A portfolio website with the following pages:
- Home Page: This is where we will showcase an outline of what we're offering.
- About Page: If you're a company or working solo (like me), this is the best place to publish your company's mission & vision, your team members, or any information about yourself that you wish to share.
- Portfolio Page: A page where all your portfolio items reside. Say, if you're a video editor, you can list all of your previous work here.
- Portfolio Item Page: A single page for a single item in your portfolio. If a visitor clicks on an item in your Portfolio Page, this is the page where they are led to. There are some cases where this page requires more detail than others. A contrasting example is a Website Case Study versus a Photographer's photo, the former requires you to write an article for the case study, while the latter is as simple as showing a photo and its meta data.
- Contact Page: This is where your contact form resides, you may also share your social media channels and other contact information here.
Note: Since this is a static website, the contact form will not do anything, I've added it in this guide so we can cover a lot of things as much as possible.
Static Website: A static website contains Web pages with fixed content. Each page is coded in HTML and displays the same information to every visitor. — Definition by TechTerms
Required Tools
You only need a browser and a text editor to follow along this guide. Although it's not necessary, but it's recommended to keep your browser updated, as we will be using the latest coding standards that may not be supported by older browsers like old versions of Internet Explorer (R.I.P). You may use any text editing tools that can edit and save .html and .css files but I recommend using any of the following code editors:
- Sublime Text: Simplest and lightest code editor, best for beginners.
- Atom: Identical keyboard shortcuts with Sublime Text, better customizability.
- Visual Studio Code: Heaviest among the three, but more powerful.
I'll be using Visual Studio Code throughout this guide. Now that you have your updated browser and a code editor, let's start building our first web page!
Your First HTML Page
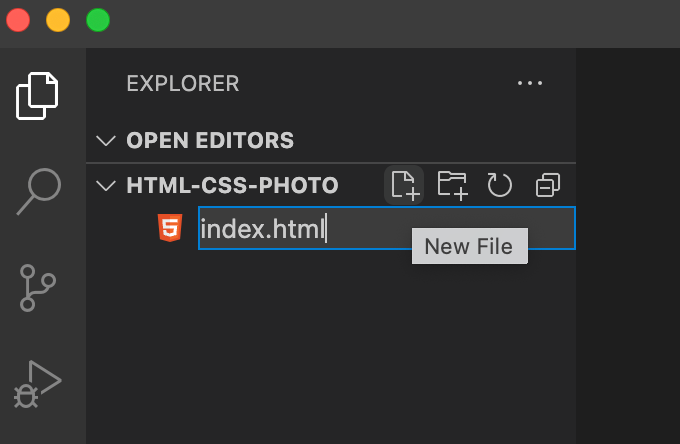
Let's get right into it! First, create a folder anywhere on your machine and name it anything, then open your folder in your code editor, this will be your project folder for your website. Next, create an index.html file inside your project folder.
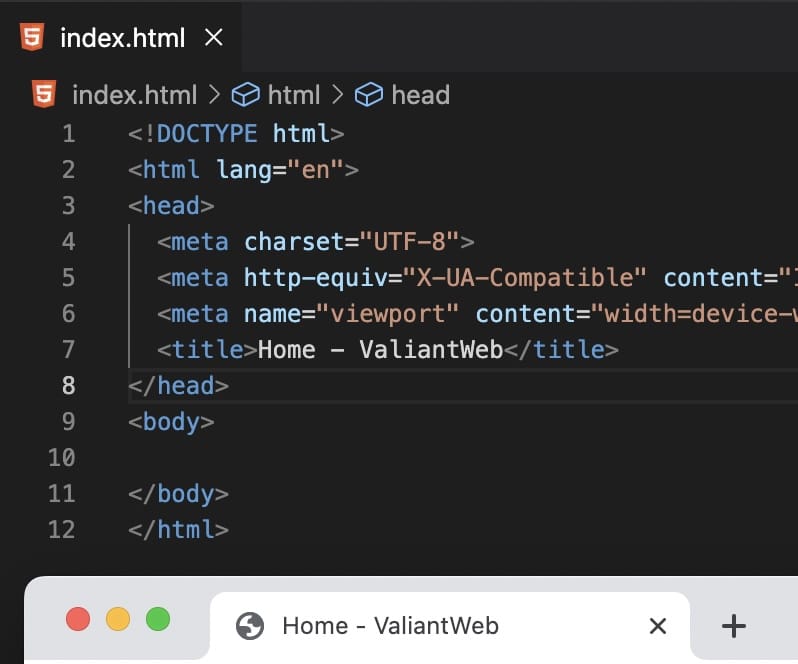
In your index.html file, copy and paste the following code to add the base markup for your html page.
<!DOCTYPE html>
<html lang="en">
  <head>
    <metacharset="UTF-8">
    <metahttp-equiv="X-UA-Compatible"content="IE=edge">
    <metaname="viewport"content="width=device-width, initial-scale=1.0">
    <title>Document</title>
  </head>

  <body>
  </body>
</html>
You don't have to worry about all the code for now, just know that this is the base HTML structure that will be recognized by your browser. For now, you only need to know four HTML tags <html> <head> <title> and <body>. Most HTML tags come in pairs, the opening and closing tags: <title> and </title>. The pair wraps around a text or other HTML tags like how the <html> tag in the code above wraps the <head> and <body> tags. Just like the name implies, it "tags" your content, that is, giving plain text context. The HTML structure and tags as a whole are like folders in your computer, where each tag is a folder. Your browser on the other hand, recognizes these tags and do its magic to present your code as a web page.
<html>- The browser will recognize this as the entire HTML content of the page, without this, it will be an invalid HTML file.<head>- This tag wraps around your page's meta tags.<title>- A unique meta tag that your browser recognize as the title of your page.<body>- The tag that wraps around your page's content.
The <head> and <title> tags
Your <title> tag lives inside the <head> tag, technically you can place your title tag outside the head, but don't do that, we're following a web standard to keep our page to be as readable by web browsers as possible - it's called "semantic web". Just know that everyone benefits if you keep your page semantic, which we will talk more about later.
The term “Semantic Web” refers to W3C’s vision of the Web of linked data. Semantic Web technologies enable people to create data stores on the Web, build vocabularies, and write rules for handling data. — Definition from W3C
Go ahead and change the text inside your <title> tag and open your file in the browser. It's a blank page, this isn't a mistake, but look at your page's tab and you'll see your new web page title.
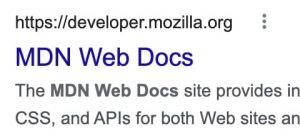
Note: Aside from telling the browser the title of the page, the title tag is also used to display your page's title on search results.
Here's Mozilla's MDN Web Docs' home page looks like:
The <body> tag
This is where you content lives and where you must put all your content-related tags to keep your page semantic. Let's add some text in the body tag, save your file, and refresh your web page. You should see your text displayed on the page.
<body>
  Hello, World!
  From my first web page!
</body>
As you may have noticed, your page displays the text in one line, this is because your browser ignores line-breaks, indentations, and extra whitespaces before and after a text.
The <p> and <br> tags
To put a text on a new line, we have to use a "block-level" HTML tag like this:
<p>Hello, World!</p>
<p>From my first web page!</p>
This should put your text on another line. We are using the paragraph <p> tag, which tells the browser that the text inside it is a paragraph, obviously! There are other block-level tags, I'll show you more as we progress along, but keep in mind that a block-level tag puts a text in a new line. Another way of splitting your text in a new line is by using the line-break <br/> tag. This is a self-enclosing HTML tag, that is, it doesn't wrap anything and doesn't have a closing tag.
<p>Hello, World!</p>
<p>From my first web page!</p>
<p>John Doe<br />- CEO</p>
The <br> tag forces a line break, if you notice, the spacing between the text is different from a <p> tag, this is because it's meant to force a line break for formatting purposes.
Note: You can omit the forward slash from the br tag like <br>, this format is widely accepted by all browsers.
The heading tags
Now that we have a couple of paragraphs, we need headings to organize our content, and of course, semantic-wise, telling the browser that a "set of paragraph belongs to this heading".
<h1>Welcome to My Website</h1>
<p>Hello, World!</p>
<p>From my first web page!</p>
<p>John Doe<br />- CEO</p>
There are six heading tags: <h1> to <h6>. Aside from readability and formatting purposes, properly organizing your heading tags maintains a semantic web and helps with search engine optimization. How do we do this? It's easy, don't skip a heading!
// ✅ Good implementation of headings.
-h1: Best Cameras for Street Photography
---paragraph
---paragraph
---h2: Fujifilm x100v
------paragraph
------h3: x100v Features
---h2: Ricoh GR
------paragraph
------h3: Ricoh GR Features

// ❌ Bad implementation of headings.
-h1: Best Cameras for Street Photography
---paragraph
---paragraph
-h1: Fujifilm x100v
---paragraph
---h3: x100v Features
---h2: Ricoh GR
------paragraph
------h4: Ricoh GR Features
By the way, you have to limit one <h1> tag per web page (or per .html) file. This doesn't make your page invalid but it's for SEO optimization. <h1> tags are block-level too, so they occupy a line on your page.
The <a> tag
The anchor <a> tag creates a hyperlink on your web page, it's an inline-level tag by default, so you can insert hyperlinks in your paragraph or heading tags without messing up the flow of text. We can create _external _and internal links with the <a> tag, but let's create an example external link for now, so I don't have to teach you the longer process of creating internal links, which we will cover later.
<h1>Welcome to My Website</h1>
<p>Hello, World!
<p>From my first web page!</p>
<p>John Doe<br />- CEO. <a href="https://en.wikipedia.org/wiki/Seven_(1995_film)">Se7en</a></p>
As you can see, I've inserted an <a> tag inside my last <p> tag, which wraps the word "Se7en".
<a href="https://en.wikipedia.org/wiki/Seven_(1995_film)">Se7en</a>
The href="" symbol inside the <a> tag is what you call an "HTML attribute", HTML tags can accept attributes and interpreted by the browser. In our <a> tag's case, the browser reads the href="" attribute and creates a link to the value you've added in between the double quotes.
Numbered and Bulleted Lists
To create lists on your web pages, use <ol>, <ul>, and <li> tags. The <li> tag is the list item inside your Numbered (<ol>), or Bullet (<ul>) list. You can use the list item <li> tag outside the list tag where it creates a bullet-styled list automatically, but it's recommended to put it in a list tag to maintain a semantic HTML.
<ul>
  <li>List Item 1</li>
  <li>
    List Item 2
    <ol>
      <li>Numbered List Item 1</li>
      <li>Numbered List Item 2</li>
    </ol>
  </li>
</ul>
You can nest a list inside a list item, too like what I did on the example above!
Summary
Before we move on to the next page, let's have a quick recap of what we have learned.
- The basic HTML structure and the importance of properly nesting the tags to produce a valid HTML page.
- The
<head>tag that holds your page's meta tags, and the<title>tag that sets our page's title as read by the browser and search engines. - The home to your page's content: the
<body>tag. - Block-level
<p>and heading tags, and the importance of a proper heading structure:<h1>to<h6>. - Inline-level
<a>tags that creates an external (or internal) link to the outside world. - Numbered and Bulleted lists:
<ol> <ul>and<li>.
We have only covered a tiny fraction of all the available HTML tags at our disposal, but technically speaking, we can create an article web page with just the HTML tags we covered above, it isn't just what you're here for, right? I've intentionally left some HTML tags that may help with text formatting for you to discover. Try looking for the bold, italic, underline, and strikethrough tags. You may also want to center-align or right-align text in your page, try looking for the solution and always, always experiment, it's the fastest way to learn! In the next page, we will be improving our page by adding images and add some basic styles.